
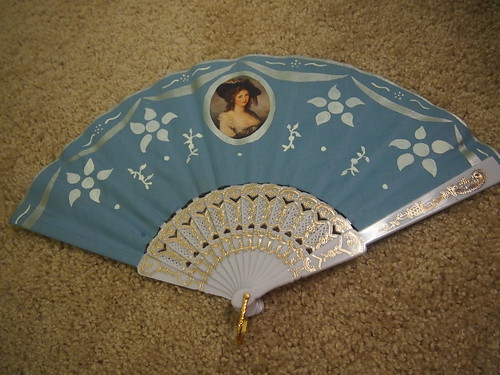
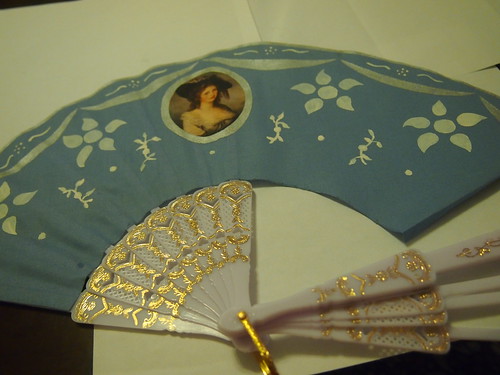
The finished result. My inspiration was this late 18th C fan in the collection of the British Museum. It has a floral printed border on a blue ground, all centered around a portrait of Charles James Fox, the Whig politician. I figured I could paint a similar floral border and then use an iron-on transfer to put a picture in the middle. I chose a self-portrait of one of my favorite female artists, Angelica Kauffman. She was one of the first women members of the Royal Academy, and a super stylish dresser.
 So here's how I made it. First I got out my roll of freezer paper, which is what I use to make stencils that are applied on fabric. Freezer paper is like wax paper, except there is only wax on one side. You can get it at some grocery stores and sometimes at craft stores (although the cheap, big rolls usually have to come from the grocery store). I drew the design I wanted for the fan on the paper side.
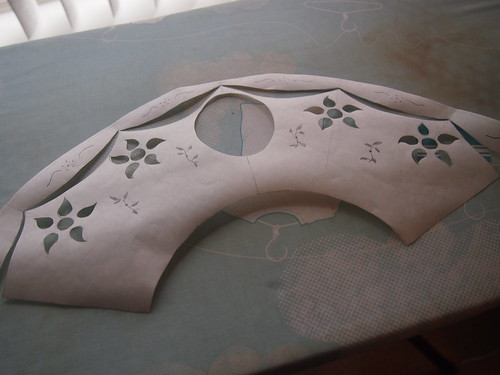
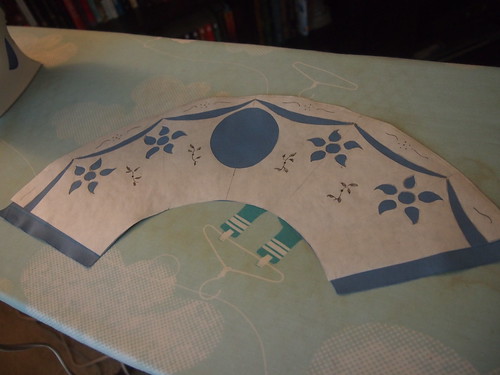
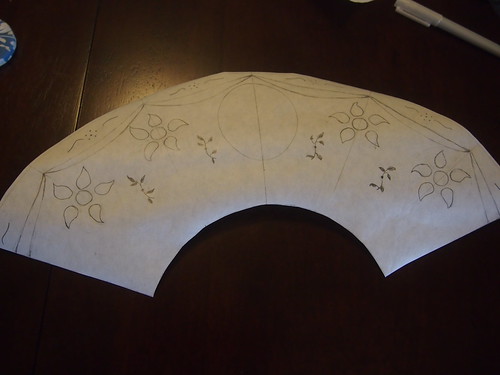 The next step was to cut out my design to make the actual stencil. I used a small pair of curved scissors and an exacto to do this. I didn't bother cutting out the tiny scrolls and flowers, as I was going to freehand those.
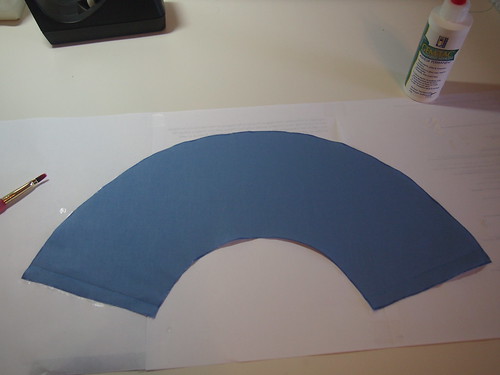
 I then prepared my fabric. After cutting out the fan shape, I used Gem Tack fabric glue to stop the edges from fraying. I left a seam allowance on the left and right sides.
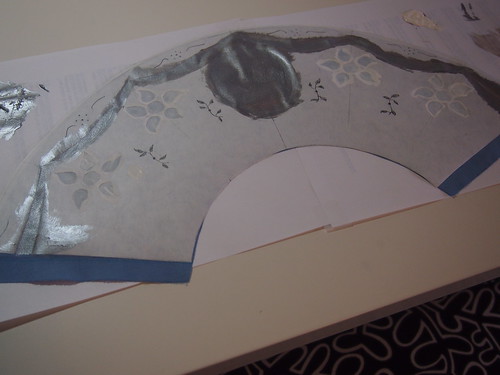
 Next I attached my stencil to the fabric. This is the great thing about freezer paper. You can iron it to your fabric! (I've only done this with cotton and cotton blends, note.) It will stick in place using the wax, so then you can paint your stencil. Later you can peel the paper off.
 Finally to the painting! I painted the center oval and the swags in silver screen-printing ink, then the flowers in white acrylic. I prefer the screen-printing ink, because it doesn't run and bleed as much as regular acrylic craft paint. But the only white I had was the acrylic...so it's what I went with.
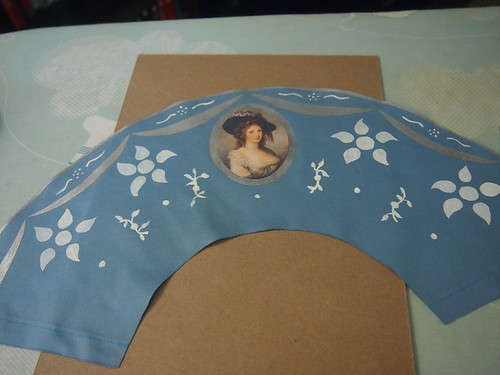
 After the paint dried, I carefully peeled off the freezer paper. This is always nerve wracking, because I'm never sure it's going to look okay. But this time, so far, so good.
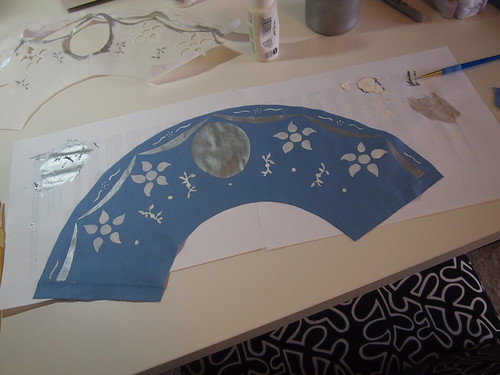
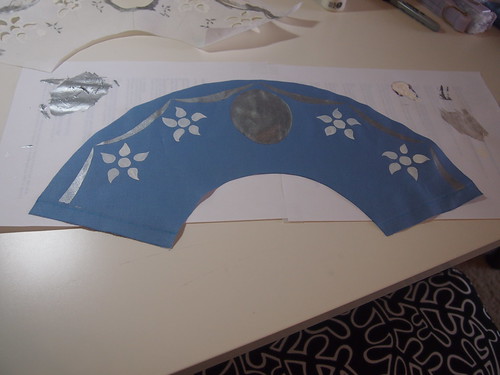 I then free-handed in some swirls and vines using white acrylic paint. The design needed to be filled in some more. After all the painting was finished and dried, I ironed the whole piece on both sides for several minutes to heat-set the paint. This is particularly important for the screen-printing ink, because it has a tendency to sit on top othe fabric and not really sink in.
 Then I ironed on an inkjet transfer that I printed with Kauffman's portrait. I used a transfer meant for dark fabric, meaning it isn't transparent.
 And finally, I glued the fabric to the fan sticks using Gem Tack. I got these sticks by taking apart a cheap wedding favor fan. It originally had a white lace leaf, which was very easy to remove.
No comments:
Post a Comment